Best Ikea Hacks Kids - Lixhult Cabinet Transformation
Oh gosh - I love nothing more than a good Ikea Hack! Especially when it's for a child's bedroom as you can get really creative with them! Kids adore bright, fun objects - it's exactly why they prefer all those tacky plastic toys over the beautiful wooden ones we wished they loved... this cheap, budget busting Ikea hack transforms the grey Lixhult cabinet into cupboard of excitement and adventure - perfect for any jungle or animal safari themed bedroom.
Keep reading below to find out how to create this simple, but effective up-cycle...
WHAT YOU'LL NEED
(click to shop)
3. Small paint brush for touch-ups
4. Paints - I used Pink Ground / Bancha Green by Farrow & Ball
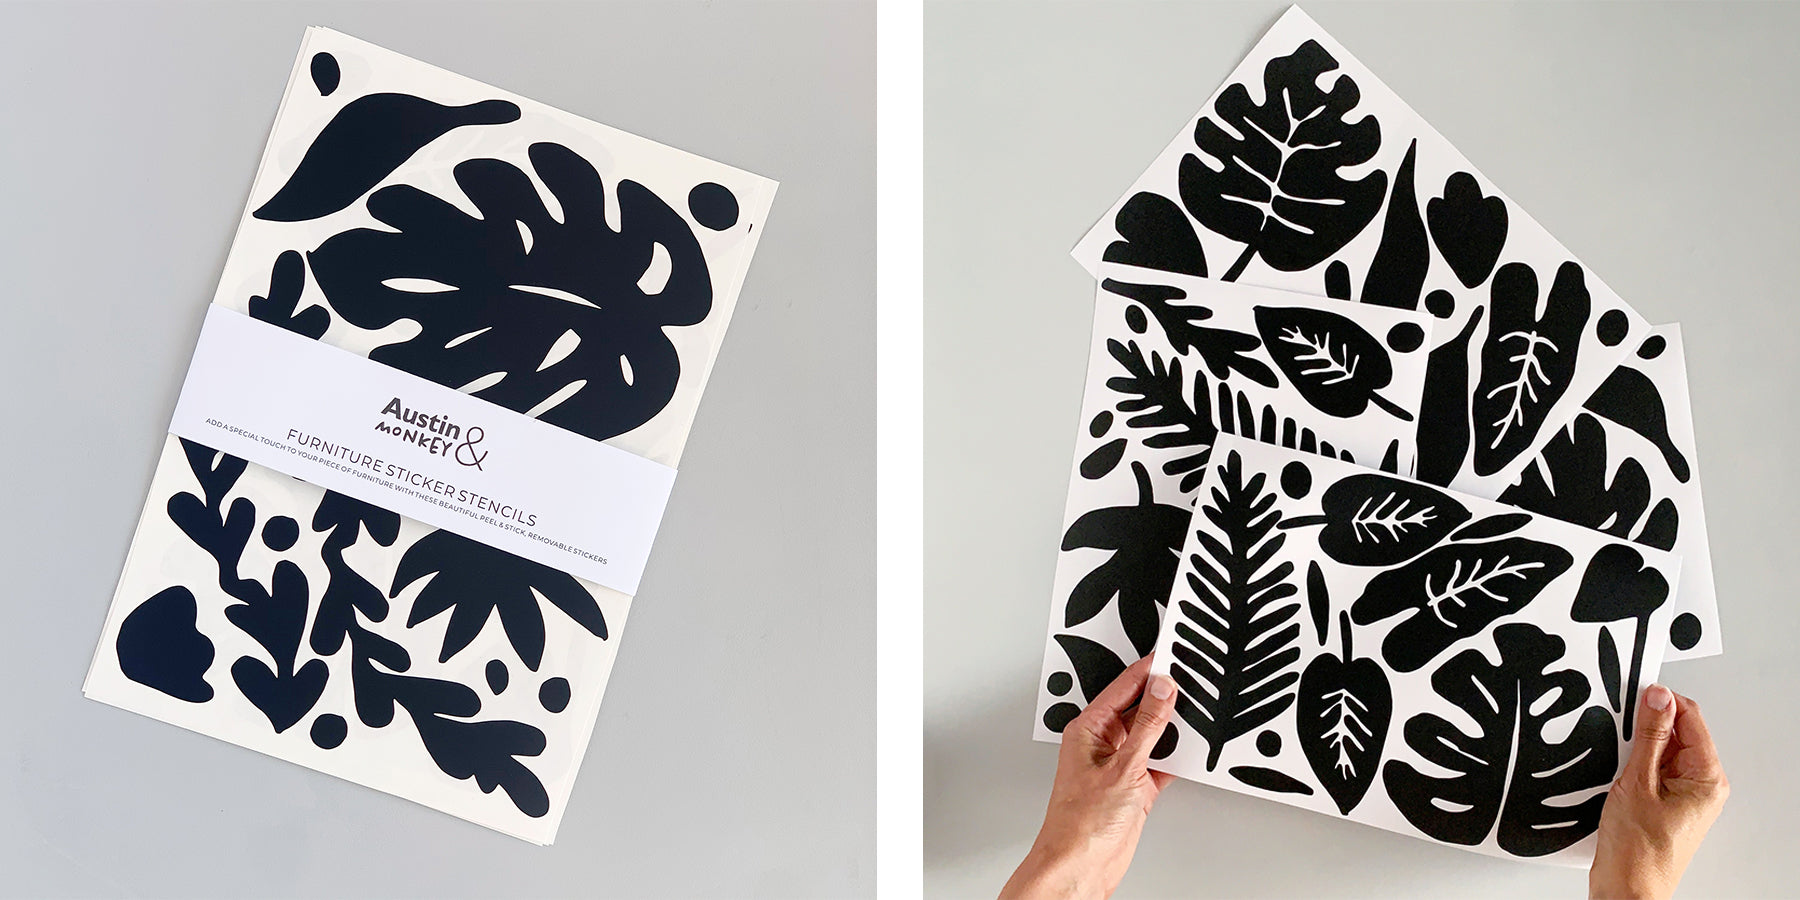
5. Jungle Decals by Austin & Monkey (£12)
6. Blu Tack

STEP 1
Once you have bought your Ikea Lixhult cabinet, you need to paint it with 2-3 layers of the GREEN paint using the FOAM ROLLER - you have two choices;
- Build it and then paint it OR;
- Paint it whilst it's still in pieces, wait for the paint to dry
TIPS
- Wait for EACH layer to dry almost completely before applying the next. This is really important. If you do not have a good solid base, the decals may peel the paint off. I blasted each layer with an electric heater before painting the next
- To prime or not to prime? I'm very slap-dash and rarely prep things before upcycling or painting them - in my opinion, if you use decent paints, then you don't need to worry so much. My Lixhult cabinet already had three layers of pink paint on before I added the green over the top. I used eggshell paint as this is better on metal surfaces. I would say, if you're a stickler for perfection, prime and prep your surface - or use spray paints. Considering I had 3 layers of old paint and 3 layers of new green paint under the decals, I was pleased to see that nothing peeled.
- Do use a foam roller for this, not a paint brush as the finish is far neater; see image below;

STEP 2
So now that your green paint is FULLY dry, you need to plan where to put your decals. I wasn't confident enough to stick them straight on - yes they will peel off and you can re-stick them, but I found my method easier and this way, I didn't risk damaging the stickers or the paint whilst repositioning. So...

1. Start by roughly cutting out all the large shapes, leaving a white border around the edge as per the image above
2. Position all the large leaves first - I used small pieces of Blu Tack to hold them in place
3. Once happy with the positioning of the largest decals, start to add in the smaller ones, then finish by adding the dots
You should end up with something that looks like this:

STEP 3
Now, it's well worth reading my tips on this! It's time to peel and stick the decals, whoop!
1. Start with the decals on the SIDES - this way, if you mess up, it's not as noticeable as it being on the front ;)
2. One by one, remove the sticker and blu tack, peel PART of the backing paper off, as shown in the image below and stick the exposed part down in place.
3. Gradually peel off the backing paper and smooth with a credit card, or similar, as you go;


4. Continue to peel and stick - any time I tried to speed things up and peel the backing paper off in its entirety, I failed and got into a right pickle trying to unstick as the decal tried to cling to itself. Below, I have tried to give you some tips on how to stick the various shapes and what to do if you get a little stuck (literally!)


STEP 4
Once you have finished placing all of your stickers, it's well worth following my next set of tips below (so you can learn from my mistakes!).
1. FIRMLY rub down the edges of every single decal... I cannot stress this enough - I was far too caught up in the moment and forgot to ensure the edges were stuck fully. If you don't do this, the paint will bleed. On the odd one that I had bothered to smooth on properly, I got beautiful clean crisp edges. USE the bank card (or similar) to do this, but don't go hell for leather at it (you want it to come off too!).
2. For the decals which go over the gaps in the doors and over the indent of the top of the cabinet, you have two choices;
- I chose to use a rotary cutter to cut the decals. I now regret doing this as the end result needed a lot more touching up. See images below of where to cut if you wish to do this method. ENSURE you rub the cut edges down A LOT else they will bleed.
- The other option is to leave the decals whole, paint over and then touch up where the pink paint has run under. I would try this way next time I use the decals as I'm convinced the finish would be better (but don't quote me on that!).

STEP 5
Once you're confident they're all stuck down, it's time to paint the pink over the top. Here are my tips;
1. Make sure the surface is free of dust etc.
2. Allow each layer to dry before painting the next. I needed 3 layers.
3. I waited for the final layer to be completely dry before peeling.


STEP 6
Peeeeeling! Ok, so this can take some practice, so....
1. Start peeling the small decals on the sides to practice.
2. I found using my nail to pick away at the decal to get it to pinch up, then lift and peel was best. I did this on top of the decal close to the edge, rather than where it meets the pink paint. This avoided scratching the pink paint.
3. If you don't have nails, try using a craft knife or kitchen knife in place, but be careful not to go through the decal and cause damage underneath.
4. When peeling, go SLOW and keep the decal CLOSE to the cabinet.
FINISHING TOUCH
I had some tiny patches that I want to touch up, due to me not pressing the decals down enough / where I cut them. I used a tiny paint brush to do this - I just blobbed paint on roughly and it covered up brilliantly. Start on ones on the side if you lack confidence.
The last thing you may want to do, is paint on a layer of clear matt varnish - I've not done this as I paint over this cabinet all the time. The eggshell paint is pretty resistant, but the varnish will give you full confidence.
...and that's it! I hope you have a fun time creating - We always love to see what you've made, so please feel free to tag myself and Austin & Monkey on Instagram. You can find us here: @prettyinprintart @austinandmonkey


